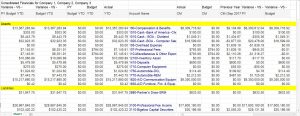
QuickBooks Consolidated Financials
QuickBooks Consolidated Financial Statements
What is QuickBooks Consolidated financials?
A set of QuickBooks Consolidated Financial Statements consists of reports that show the operations, cash flows, and financial position of a parent company and each individual subsidiary. You can easily print each companies’ financial statements from your QuickBooks Company files. To get consolidated financials from multiple QuickBooks company data files you need to have a set of consolidated reports capable of easily combining them.
These financial statements include assets, liabilities, equity, income, expenses and cash flows. The balance in individual accounts from each subsidiary are totaled and presented in a single total and as a single economic entity
The top 3 reasons to have QuickBooks Consolidated Financials at your fingertips?
Consolidate – add up financial information from multiple companies with accurate totals
Standardize – to present professional financials with consistent formatting
Automate – set them up and use them over and over again with the click of a button
What financial statements can be consolidated?
standard balance sheet
income statement
cash flow statements
Other statements
Who looks at consolidated financials?
Bookkeepers
Individual Owners
Holding Company Controller
Board of directors
Financial Institutions
Tips and tricks for consolidated financials
Each company should be on the same fiscal year
The chart of accounts needs to be standardized across all companies
All entries should be recorded in the individual companies prior to generating consolidated statements
Presentation of individual and consolidated statements should be in the same format
Advanced Reporting for QuickBooks
How do I print QuickBooks Financial Statements?
- Start QuickBooks
- From the Reports menu
- choose Company & Financial
- then choose the desired QuickBooks Financial Statement
- On the Display tab
- change the date range to 12 months
- (for example, select Last Fiscal Year in the Dates drop-down)
- Change the Columns drop-down from ‘Total only’ to ‘Month.’
How do I print QuickBooks Financial Statements to PDF?
- Select the report or form you want to print in QuickBooks
- Click the “File” menu
- Select “Print” to use a third-party PDF printer
- Then, select your PDF printer from the options
Alternatively, select “File” and “Save as PDF” to use the built-in QuickBooks PDF printer.
How do I print QuickBooks Financial Statements to excel?
- Click on the Reports menu.
- Choose Company & Financial.
- Select either Profit and Loss by Class or Balance Sheet by Class.
- Choose the Dates.
- Click on the Excel button.
How do I print the QuickBooks Balance Sheet?
- Start QuickBooks
- From the Reports menu
- choose Reports
- Company & Financial
- Balance Sheet Standard
- On the Display tab
- change the date range to 12 months
- (for example, select Last Fiscal Year in the Dates drop-down)
- Modify the Columns drop-down from ‘Total only’ to ‘Month.’
How do I customize the QuickBooks Balance Sheet?
You can customize your Balance Sheet report to show Year-over-Year columns.
- Go to Reports.
- In the search bar, search for and open Balance Sheet Comparison.
- Select Customize.
- Under Rows/Columns, select the Columns drop-down, then change it to the desired comparison period.
- Select Memorize
- Enter a new name to save if you wish to create a custom version
How do I print the QuickBooks Income Statement?
- Start QuickBooks
- From the Reports menu
- choose Company & Financial
- then choose Profit & Loss Standard
- On the Display tab
- change the date range to 12 months
- (for example, select Last Fiscal Year in the Dates drop-down).
- Change the Columns drop-down from ‘Total only’ to ‘Month.’
- Learn QuickBooks
How do I customize the QuickBooks Income Statement?
You can customize your Income Statement report to show Year-over-Year columns.
Step 1: Run a report
- Go to the Reports menu.
- Find and open the report you want. …
- Use the basic filters at the top of the report to adjust things like the report dates.
- Select Customize to open the customization window.
- Under Rows/Columns, select the Columns drop-down, then change it to the desired comparison period.
- Select Memorize
- Enter a new name to save if you wish to create a custom version

QuickBooks Consolidated Financials