FRx Training Classes – Consultant MAS 90 MAS 200 Support Conversions to Sage Intelligence Certified Sage Consultant
FRX Training Classes
FRx Consultant, MAS 90, MAS 200
Support – Conversions to Sage Intelligence
FRx Financial Reporting Tool for Sage MAS 90 and MAS 200.
FRx Training Classes – FRx may still work with some of the 4.X versions and FRx Reports and it is simple to convert FRx financial statements into Sage Intelligence. FRx included the following module options and has been sunset by Microsoft.
- FRx Report Designer
- FRx DrillDown Viewer
- FRx Report Launcher
- FRx Report Manager
- FRx Report Server
- FRx Report Wizard
- FRx WebPort
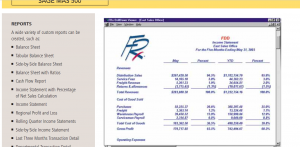

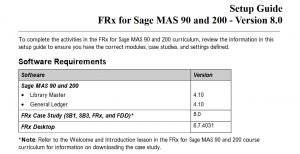
History of FRx
Microsoft FRx was created by the FRx Software Corporation in Denver, Colorado. The first FRx product was a DOS-based application that originally shipped around 1991 and integrated with The Platinum Series for MS-DOS, an accounting suite created by Advanced Business Microsystems (now Epicor) and marketed in a joint venture with IBM. A Windows-based version of FRx was available in 1993. FRx Software was acquired by Great Plains Software, which itself was purchased by Microsoft, where it was run as a wholly owned subsidiary. FRx was integrated with numerous general ledger systems.
FRx Desktop is a full-featured, graphical reporting tool that comes bundled with the Sage MAS 200 General Ledger module. It also provides multi-company consolidation and robust security.
FRX Download
You may have tried recently to download the latest FRX service pack 11 from Sage. Unfortunately, as of January 31, 2011 Sage is no longer able to distribute service packs due to Microsoft (who publishes FRX) discontinuing sales of FRX (support however extends to December 2012).
If you need to download FRX 6.7 Service Pack 11 (aka R11670) you can check the Microsoft Knowledgebase for availability.
Difference between FRX and Sage Intelligence
- Sage Intelligence works with current versions of Sage 100
- Sage Intelligence uses the connector module to connect to any data table
- Sage Intelligence can connect to multiple data tables.
Converting FRx Reports to Sage Intelligence
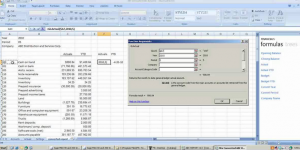
The ease of use for the Report Designer in Sage Intelligence can convert your FRx financial reports into Sage Intelligence. Using Microsoft Excel, the Report Designer Add-in allows you to map (Rows, Columns, and Reporting Trees) to the FRx and convert your report layouts, add formulas. Once converted the user can then save the designs as new Sage Intelligence reports.
Step1. Installed Sage Intelligence and the Sage Intelligence Report Designer Add-In
Software Requirements
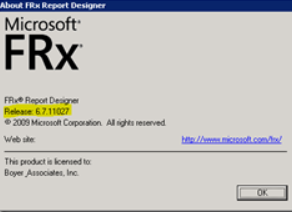
- FRx 6.7 Service Pack 11
- Sage MAS 90 and 200 Intelligence 4.4 or later
- Sage Intelligence Report Designer Add-In
- Sage Intelligence Report Designer License
- Sage Intelligence Report Manager License
- Active Connector License (Required for Multi- Company Consolidations only)
- Microsoft Excel 2007 or Microsoft Excel 2010 32 bit
Step 2.
- Understanding How FRx Report Concepts Relate to Sage Intelligence
- FRx and Sage Intelligence are similar as they both allow you to build reports using report building blocks.
- FRx report building blocks are known as Row Formats, Columns Layouts and Reporting Trees.
The model behind the Sage Intelligence Report Designer Add-In is to break down a report into reusable building blocks and then allows you to control where and how these building blocks fit together to create a report using an excel spreadsheet as their design platform. The Sage Intelligence building blocks are Lists, Formulas and Trees and are made available via the Task Pane inside Excel. Both FRX and Sage Intelligence use the standard Excel functions making the task easier for users who are proficient in Excel.
Step 3. Prepare the FRx report to be exported
- Open FRx Report Designer.
- Log in to the Company which contains the reports you wish to convert.
- Select Catalog of Reports.
- Select the Catalog ID of the report you wish to convert.
- Click Open.
- Click Open Column in the toolbar.
- Ensure there is a column of type ACCT and DESC. This will ensure the Account Code and Descriptions from the Row Format are exported. If either of the columns are not present, add them
- Save and Close the Columns.
- Select Report Options.
- Under Formatting ensure that the option Display rows with no amounts is selected. This will ensure that all of the accounts are exported even if it has zero balances.
- Click Report Options, Tree Options.
- Ensure the Page breaks option is set to either, before each reporting unit or Use reporting tree.
Step 4. Export the FRx report to Microsoft Excel
- Click Output, Output Options.
- Change the output type to Formatted Excel (XLS, XLSX).
- In order for the report to be compatible with the Sage Report Designer Add-In report, the report must be saved in the latest format. Change the file name extension to .XLSX.
- Select all available options
- Select generate report
Step 5. Convert the data to Sage Intelligence Reporting formulas
The next step is to copy the static FRx report created previously in the Exporting Reports topic and convert it to a report that Sage Intelligence Reporting can execute against your ERP database
Step 6. Save the report into Sage Intelligence
- Save the Report to Sage Intelligence Reporting
- Open the Sage Intelligence Reporting Report Manager.
- Right-click on the report for which the changes were made, and select Create and Link Template.
Step 7. Review
- Review
- Verify the Report Data
Compare the results generated in FRx to the results generated in Sage Intelligence confirming the report is converted and working properly with the same results.
FRx Desktop Core Module for MAS 90 and MAS 200 Features included:
- Real-time Data Access
- Graphical Formatting
- Drill Down

- Roll Up
- Unposted Data
- Export to Excel and HTML
- Cleaver-Use the special “Cleaver” tool
- Drag and Drop
- Account Types
- XML Support
- Printing Options
- Security and E-mail.
- Spreadsheet Link
- Reporting Trees
- Multi-Company Consolidations
- Security-Secure by company and report templates.
- Account Sets
- MAPI E-mail Support
The Demand Page viewing feature sends only the requested information. Reports:
- Balance Sheet
- Tabular Balance Sheet
- Side-by-Side Balance Sheet
- Balance Sheet with Ratios
- Cash Flow Report
- Income Statement with Percentage of Net Sales Circulation
- Income Statement
- Regional Profit and Loss
- Rolling Quarter Income Statement
- Last Three Months Transaction Detail
- Departmental Transaction Detail
- Departmental Transaction Detail
- Debit and Credit Transaction Detail
- Full Year Transaction Detail
- Transaction Detail Drill-Down Report (using Drill Down Viewer)
- Trial Balance
- Full Year Forecast
- Budget Variance Analysis
- Variance Analysis Using Trial Balance
- Exception Reporting
- Rotated Departments and Expenses
- Row Linking Balance Sheet and Income Statement
- Consolidated Balance Sheet
- Consolidated Balance Sheet and Income Statement
- Side-by-Side Consolidated Income Sheet
- Consolidated Balance Sheet with Eliminations
- Consolidated Income Statement
- Side-by-Side Consolidated Income Statement
Frx Training Classes – Sample Company FRx in FDD Setup
Follow the steps below to set up the FDD company within FRx. Complete each step in the order listed.
- Log on to FRx.
- From the Company menu, select Information.
- Click New.
- Enter FDD as the FRx company code and FDD Company as the company name.
- From the Specification Set drop down list in the FRx System Information tab, select FDD as thespecification set
- Click the System Specific Information tab and enter FDD as the company.
- Select the drop-down list from the Data Source field and select FRX_MAS (or the DSN you created) as the data source to the MAS90 directory.
Note: If using FRx with multiple installations of Sage MAS 90 and 200, it is recommended to create a separate DSN to access those files. Refer to the README document included with the FRx installation for information on how to create a System DSN.
- Click Save and click Save as Default.
Note: You will use FDD for in-class activities.
- Close Company Information.
Creating a Specification Set
You must create the following specification sets for use with the Sage MAS 90 companies.
From the Company menu in FRx, select Specification Sets. Define the following specification set.
Save the new specification set and select the Import button to import the file from the Beg_Spec.tdb now located in the IO_Data directory.
Create an FDD company and set up FDD as the default specification set in FRx under Company Information. Verify setting under the System Specification Information tab for the FDD company in FRx.
