Sage 100 Accounts Payable Data Conversion

Sage 100 Accounts Payable Data Conversion

From another System

Gather the appropriate information and follow these steps:

  1. Gather all unpaid invoices as of your last closed accounting period.
  2. Run a report from your current system or prepare an adding machine tape totaling the invoices. This amount should equal the account balance for the accounts payable account(s) in General Ledger.
  3. Set the accounting date to the last day of the last closed accounting period. This is the current period established in Accounts Payable Options.
  4. Enter 1099 payments in the current calendar year.
  5. In Invoice Data Entry, enter the outstanding balance amounts for each invoice using the original invoice dates. During the distribution process, post the entire distribution balance to your accounts payable account number in General Ledger.

Note: Do this when you have expensed these invoices in the previous system.

  1. Print the Invoice Register from the Main menu. The total should equal the balance of the accounts payable account in General Ledger.
  2. Update the Invoice Register and the Daily Transaction Register.
  3. Run Full Period End Processing to clear the month-to-date purchases fields and forward to the next period.
  4. Reset the accounting date to the first day of the current accounting period.

Linking Accounts Payable to Accounts Receivable

  • Vendor / Customer Link Maintenance
  • AP form AR Clearing Selection
  • AP form AR Clearing Entry
  • AP form AR Clearing Register

Are you interested in learning about Converting Accounts Payable to Sage 100 from Another System? Accounting Business Solutions by JCS offers Sage 100 training classes, including Converting Accounts Payable to Sage 100 from Another System.  Call us today at 800-475-1047 or email us at solutions@jcscomputer.com today to get started.


Sage 100 Accounts Payable and Receivable Maintenance

Learn how to maintain Sage 100 Accounts Payable and Sage 100 Accounts Receivable with Sage 100 training classes from Accounting Business Solutions by JCS!

One of the most attractive features of Sage 100 is its flexibility, and the Sage 100 Accounts Payable module and Sage 100 Accounts Receivable modules are no exception. Sage 100 Accounts Payable Maintenance and Accounts Receivable Maintenance contains a variety of options which can be customize to fit your particular needs.


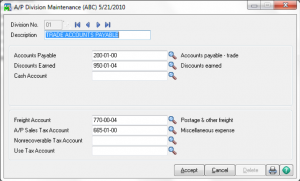
Division Maintenance

  • GL Accounts are assigned
  • Leave Cash Account blank to assign by bank code
  • Use 00 (default) for no divisions
  • You must enter an Accounts Payable and Discounts Earned account to avoid missing or invalid general ledger account errors when updating.


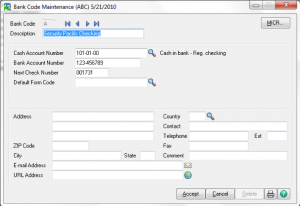
Bank Code Maintenance

  • A is default bank code
  • Bank Code Beginning Balances are entered through Bank Reconciliation
  • After a bank code is defined and the integration to Bank Reconciliation is selected, transactions using a bank code are updated to Bank Reconciliation.


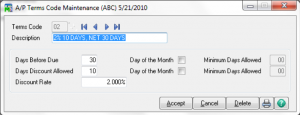
Terms Code Maintenance

  • 00 is default terms code


Sales Tax

For calculation of sales tax in AP or PO

  • Sales Tax Class Maintenance
  • Sales Tax Code Maintenance
  • Sales Tax Schedule Maintenance
  • Sales Tax Account Maintenance

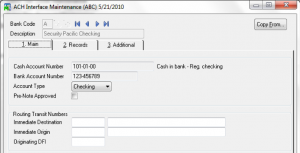
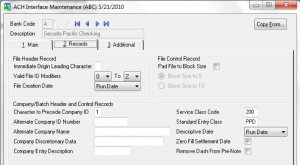
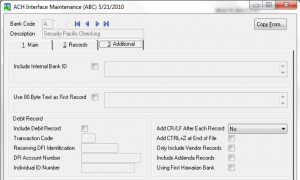
ACH Interface Maintenance


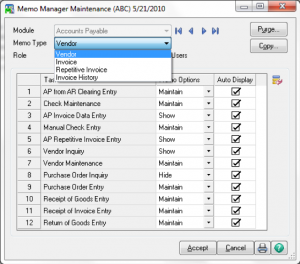
Memo Manager Maintenance


  • Assign security roles to where memos can be created / viewed


Are you interested in learning how to maintain Sage 100 Accounts Payable or Sage 100 Accounts Receivable? Accounting Business Solutions by JCS offers Sage 100 training classes, including how to customize options in Accounts Payable in Sage 100.  Call us today at 800-475-1047 or email us at solutions@jcscomputer.com today to get started.

Sage 100 Accounts Payable Options

Learn how to use Sage 100 Accounts Payable Options with Sage 100 training classes from Accounting Business Solutions by JCS!

One of the most attractive features of Sage 100 is its flexibility, and the Sage 100 Accounts Payable module is no exception. AP in Sage 100 has a variety of customizable options which range from sales tax reporting and aging options to printing and batch processing options. Continue reading to see the various customizable screens in Sage 100 Accounts Payable.


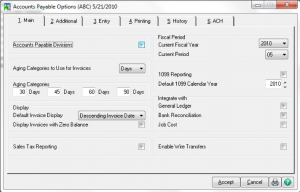
Accounts Payable Options – Main

  • Divisions
  • Aging
  • Sales Tax Reporting
  • Integration


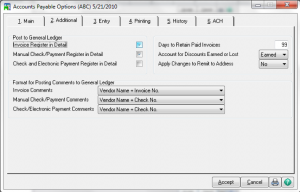
Accounts Payable Options – Additional

  • Posting
  • Comments
  • Invoices paid on or before the number of days entered are purged automatically during period-end processing.
  • Other


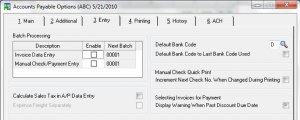
Accounts Payable Options – Entry

  • Batch Processing
  • Defaults
  • Resets


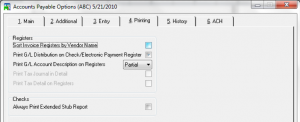
Accounts Payable Options – Printing


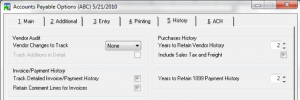
Accounts Payable Options – History


Accounts Payable Options – ACH


Are you interested in learning how to customize Sage 100 Accounts Payable? Accounting Business Solutions by JCS offers Sage 100 training classes, including how to customize options in Accounts Payable in Sage 100.  Call us today at 800-475-1047 or email us at solutions@jcscomputer.com today to get started.

How to Set Up Sage 100 Accounts Payable

Correctly setting up Sage 100 Accounts Payable is crucial to your Sage 100 success. Learn how to set up Sage 100 Accounts Payable here!


What’s needed for AP setup

Before using Accounts Payable for a new company, you must complete the Accounts Payable system startup process. Before beginning the system startup process, gather the following information:

  • Your general ledger chart of accounts
  • A list of states, counties, and local areas to which you report sales tax and their tax rates
  • Your bank account number(s) for the checking account(s) used by Accounts Payable
  • A list of standard payment terms offered by your vendors
  • A list of vendors, including addresses and phone numbers
  • All unpaid invoices at the time of installation


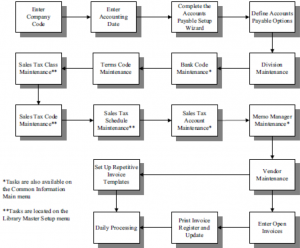
Steps for setting up Sage 100 Accounts Payable

  1. Enter the Company Code
  2. Enter Accounting Date
  3. Complete the Accounts Payable Setup Wizard
  4. Define Accounts Payable Options
  5. Division Maintenance
  6. (Bank Code Maintenance)
  7. Terms Code Maintenance
  8. (Sales Tax Class Maintenance)
  9. (Sales Tax Code Maintenance)
  10. (Sales Tax Schedule Maintenance)
  11. (Sales Tax Account Maintenance)
  12. (Memo Manager Maintenance)
  13. Vendor Maintenance
  14. Beginning Balance Entry
  15. Open Invoice Entry
  16. Print Invoice Register and Update
  17. (Set-up Repetitive Invoice Templates)
  18. Daily Processing

Are you interested in learning how to set up Sage 100 Accounts Payable? Accounting Business Solutions by JCS offers Sage 100 training classes, including how to set up Accounts Payable in Sage 100.  Call us today at 800-475-1047 or email us at solutions@jcscomputer.com today to get started.

Accounting Business Solutions by JCS Nominated for 2017 Entrepreneurial Excellence Awards – 800-475-1047 – Support – Training – Consultant – Reseller

Accounting Business Solutions by JCS Nominated for 2017 Entrepreneurial Excellence Awards 

FOR IMMEDIATE RELEASE
Lauren LaMantia
800-475-1047

Arlington Heights, IL September 2017– Accounting Business Solutions by JCS the nation’s leading premier provider of technical support and training for Sage Software, Intuit QuickBooks, MiSys, JobOps, Point of Sale, Timeslips, Advanced Reporting and Barcoding announced their nomination for 2017 Entrepreneurial Excellence Awards presented by Business Ledger. The Entrepreneurial Excellence Award recognizes and builds entrepreneurship in suburban Cook County, DuPage County, Kane County, Lake County, McHenry County and Will County Illinois.

“Accounting Business Solutions by JCS always strives to provide highest quality training and support to its customers”, said Jennifer O’Brien, President, Accounting Business Solutions by JCS “Our commitment to growth for our clients is what really sets us apart”.

About Accounting Business Solutions by JCS

Accounting Business Solutions by JCS provides software technical support and training for Sage Software products including Sage 50 (formerly Peachtree), Sage 100 (formerly MAS 90/200), Sage 100 Advanced, ACT!, Timeslips, and Intuit QuickBooks. In addition, JCS specializes in integration between accounting applications and 3rd party add-ons including e-commerce shopping carts, point of sale and barcode systems and customer relationship management applications. Accounting Business Solutions by JCS provides installation, training – online, your site or our training center, technical support, online, on-site or by phone.

With over 25 years of accounting and business knowledge as well as proficient technical background you get the training and support your business needs and deserves working with a proficient expert consultant.   You can work with the same consultant to help you master your Sage Software and for those occasional questions you need help with so you can understand best practices and how to manage your company information and books.

Put our 25 years of experience to work for you!

“Your Success is Our Goal”

www.jcscomputer.com          800-475-1047          solutions@jcscomputer.com

Like us on Facebook  and follow us on Twitter

Alabama Alaska Arizona Arkansas California Colorado Connecticut Delaware Florida Georgia Hawaii Idaho Illinois Indiana Iowa Kansas Kentucky Louisiana Maine Maryland Massachusetts Michigan Minnesota Mississippi Missouri Montana Nebraska Nevada New Hampshire New Jersey New Mexico New York North Carolina North Dakota Ohio Oklahoma Oregon Pennsylvania Rhode Island South Carolina South Dakota Tennessee Texas Utah Vermont Virginia Washington West Virginia Wisconsin Wyoming
Sage 50 Sage 100 QuickBooks – Accounting Business Solutions by JCS Expands adding a new office in Charleston, South Carolina 800-475-1047 – Support – Training – Consultant – Reseller

Sage 50, QuickBooks Sage 100 Expands to Charleston, South Carolina

FOR IMMEDIATE RELEASE
Lauren LaMantia
800-475-1047

Charleston, South Carolina  – Accounting Business Solutions by JCS the nation’s leading premier provider of technical support and training for Sage Software, Intuit QuickBooks, MiSys, JobOps, Point of Sale, Timeslips, Advanced Reporting and Bar coding announced the addition of a new office in Charleston, South Carolina. A drastic increase in demand for the company’s training and services to the small-medium business market necessitated the addition of the new office.

“Accounting Business Solutions by JCS always strives to provide highest quality training and support to its customers”, said Jennifer O’Brien, President, Accounting Business Solutions by JCS “Our new Facility in Charleston, South Carolina will provide expanded consulting services to our South Carolina based clients”.

About Accounting Business Solutions by JCS

Accounting Business Solutions by JCS provides software technical support and training for Sage Software products including Sage 50 (formerly Peachtree), Sage 100 (formerly MAS 90/200), Sage 100 Advanced, ACT!, Timeslips, and Intuit QuickBooks. In addition, JCS specializes in integration between accounting applications and 3rd party add-ons including e-commerce shopping carts, point of sale and barcode systems and customer relationship management applications. Accounting Business Solutions by JCS provides installation, training – online, your site or our training center, technical support, online, on-site or by phone.

QuickBooks Sage 50 and Sage 100 Charleston. With over 25 years of accounting and business knowledge as well as proficient technical background you get the training and support your business needs and deserves working with a proficient expert consultant.   You can work with the same consultant to help you master your Sage Software and for those occasional questions you need help with so you can understand best practices and how to manage your company information and books.

Put our 25 years of experience to work for you!

“Your Success is Our Goal”

www.jcscomputer.com          800-475-1047          solutions@jcscomputer.com

Like us on Facebook  and follow us on Twitter

Alabama Alaska Arizona Arkansas California Colorado Connecticut Delaware Florida Georgia Hawaii Idaho Illinois Indiana Iowa Kansas Kentucky Louisiana Maine Maryland Massachusetts Michigan Minnesota Mississippi Missouri Montana Nebraska Nevada New Hampshire New Jersey New Mexico New York North Carolina North Dakota Ohio Oklahoma Oregon Pennsylvania Rhode Island South Carolina South Dakota Tennessee Texas Utah Vermont Virginia Washington West Virginia Wisconsin Wyoming
Things to Consider before installing Sage Timeslips Premium/2017+800-475-1047 – Training – Support – Consultant – Reseller

Considerations and Recommendations prior to installing Sage Timeslips Premium/2017+

800-475-1047 – Training – Support – Consultant – Reseller

Installation Prep

  • Verify Access Rights
  • Verify System Requirements
  • Using Mapped Drives (Network installations only)

For Upgrades Only to Timeslips Premium/2017+

  • Purge Sage Timeslips Premium Data Timeslips 2006 or earlier
  • Amount of time to convert data
  • Verify database integrity

Additional Topics to Consider

  • Accessing PDF copies of documentation
  • Viewing Training Videos
  • Installing Sage Timeslips Premium/2017+
  • Running Sage Timeslips Premium/2017+ in a terminal services environment
  • Installing Timeslips and Firebird Engine on multi-boot computer
  • Installing Sage Timeslips Premium/2017+ locally (Network Installations only)
  • Diagnosing computers with Timeslips Administrator
  • Checking for updated files from Sage website
  • Service Release Notes
  • Converting your Database (for Upgraders only)

Verifying System Requirements

Prior to installing Sage Timeslips, verification of servers and workstations needs to be completed to ensure they meet the necessary requirements.

Terminal Server Requirements

  • Minimum RAM 8 GB; 16 RAM GB recommended
  • Windows server 2008, 2012

Application Server and Database Server Requirements

  • Minimum RAM 8 GB; 16 RAM GB recommended
  • 300 MB free hard disk space for application files
  • 100 MB minimum for database files
  • Windows Server 2008, 2012
  • Windows Professional, Windows 8.x, Windows 10 (when using a peer-to-peer environment)

Workstation Requirements

  • Windows 8.x (not including Windows RT), Windows 7 Professional or Ultimate
  • Internet connection to use Sage Timeslips web features and product documentation. High-Speed internet connection is recommended
  • 100 MB minimum if using a local database
  • 300 MB free hard disk space for application files. Additional space may be required when saving additional files (i.e. printing bills to PDF)
  • Wired network connectivity requires a network adapter appropriate to your type of network. Wireless network connectivity is not compatible.
  • 4 KBps modem if using the dialing features within Sage Timeslips; 56KBps modem recommended
  • Adobe Reader to review PDF files (Adobe Reader v11 is included with Sage Timeslips installation although an additional 25 MB of hard disk space is required for Adobe Reader Installation)
  • Recommended 8 GB RAM, 4 GB RAM minimum
  • PC compatible keyboard, mouse and printer
  • Display supporting 1024×768 or higher resolution recommended
  • Microphone or headset is required for Speech Recognition Support
  • Mail Merge functionality requires Microsoft Word 2013, 2010
  • Print to Excel feature requires Microsoft Excel 2013, 2010
  • Outlook Integration requires Microsoft Outlook 2013, 2010
  • Sending bills and statements by email requires MAPI-compliant email program. Outlook Express and AOL email are not compatible.
  • Receiving slips by email requires Microsoft Outlook 2013, 2010 on the computer that receives the slips
  • Sound card and speakers recommended for enhanced interaction
  • Scanning functionality in Slip Attachments and Document Access requires TWAIN compatible scanner

Verifying Access Rights

To install and use Sage Timeslips Premium, all network users must have Change file rights (Read, Write, Execute, and Delete) for the installation folder. Before installing Sage Timeslips Premium, you must log into Windows with administrator rights to install Sage Timeslips Premium. The Setup program will change Windows access rights to installation folder for Users group to Full Control.

Preparing to Upgrade Sage Timeslips (Upgraders Only)

In order to upgrade a previous version of Sage Timeslips, you must convert your database before you can use it with Sage Timeslips Premium. To view the Conversion guide please review the instructions in KB article 63922 “Converting your BDE database to Firebird” in Related Resources below.

Using Mapped Drives (Network Installations Only)

In prior versions of Sage Timeslips it was required to Map network drives and make sure they all has the same network path on all network machines. In Sage Timeslips Premium moving forward this is no longer a requirement. If you are upgrading you do not have to change anything and can keep using Mapped drives if you still have them. If you are performing new installations mapped drives are no longer necessary or required.

Verifying Database Integrity

Prior to installing Sage Timeslips Premium, make a backup in your current version by selecting File then Backup.

Next, use the Data Verification dialog box. Select File, Data Verification in your current version to verify the integrity of your database.

Mark only Look for Errors and click OK to search for errors.

If Sage Timeslips encounters any validation, linking, or integrity errors during the verification process, please contact Technical Support to evaluate and correct the errors before installing your upgrade.

Do not attempt to repair any errors on your own.

Purging Sage Timeslips Data Timeslips 2006 or earlier

Purging data in order to be able to convert

In order to upgrade from Timeslips 2006 or earlier, Sage Timeslips Premium cannot convert databases with more than 300,000 records of any type. This includes clients, times and expense slips, accounts receivable transactions, and client funds transactions. If you have more than 300,000 of any of these types of records, you must purge data before you can convert your database for use with Sage Timeslips Premium.

Accessing the Purge Function

Typically, you will use the File, Purge command to access the Purge dialog box. Please refer to the online help system of your previous version of Sage Timeslips for more information about purging Sage Timeslips data. When purging slips, be sure to send them to an archive file so you can access them later if needed.

Accessing PDF Copies of Documentation

Sage Timeslips Premium installs electronic copies of their documentation for easy access. Find these documents easily from the Help, Other Documents menu within Sage. Adobe Reader is needed to view these documents.

Viewing Training Videos

Through Sage Timeslips Premium, online training videos can be accessed and viewed. Select Help, View Training Videos.

Open Applications or Windows Processes

It is recommended all open applications and windows processes are closed/stopped prior to starting the conversion. Open applications could use resources needed for the conversion process which could slow or not allow the process to properly complete/run. All open tabs and internet browsing should also be closed.

Amount of Time to Convert Data

The process may take several hours to complete based on the size of your database, the workstation you are using, and the types of records you are converting. In general, larger databases will take an extended amount of time to convert. Allowing for ample time to convert is always recommended as is limited interruption. If the process appears to not respond do not end the process manually.

For example, when upgrading from Sage Timeslips 2006 and prior, the process converts each slip. The more slips you have in your database, the longer the process is to convert. If upgrading from Sage Timeslips 2014 or prior, the process converts each reprint bill image so the more bill images you have the longer the process is to convert.

Installing Sage Timeslips Premium/2017+

Refer to the online Network Installation Guides prior to installing Sage Timeslips Premium for comprehensive information regarding the installation process. Article 63919 in Sage Timeslips Premium network installation guides in Related Resources.

Installing Sage Timeslips Premium/2017+ and Firebird on a multi-boot computer

Two or more operating systems installed on one computer it is recommended you install Sage Timeslips Premium under each operating system. This will update your computer’s registry settings and ensure that Sage Timeslips Premium runs properly from each operating system installation.

Installing Sage Timeslips Premium/2017+ locally – For Network Installations Only

When installing Sage Timeslips Premium onto a network it is recommended to run the local installation on each computer that will be using the program. The local installer copies Sage Timeslips Premium program files to the network workstation allowing users to run the Sage Timeslips Premium files from the network workstation and share a database on the network server. When this configuration is used performance is increased and the load on your firm’s network is reduced.

To start the local installation procedure from a workstation, select Start, Run from the windows taskbar and click Browse. Browsing your server machine, select Setup.exe within the Loclinst folder – Timeslips\Loclinst on the Sage Timeslips Premium Server, by default – then click OK.

If unable to locate the server machine name in the browse list you should be able to locate it by entering \\server_name (where server_name is the name of your server) and press Enter. As long as your current login has proper rights to access the network share then a windows dialog should appear showing the contents of your server. If a network login dialog box appears the windows credentials with access rights to the network is needed to gain access.

More information can be found for performing a local installation by following KB article 63864 called How to perform a local installation of Sage Timeslips Premium and 2017+.

Converting your Database – For Upgraders only

Consider the following when you are ready to convert your database:

  • Multi-user scenario – if Sage Timeslips Premium is installed on the same computer that stores your Sage Timeslips Premium data, it is recommended that you access and complete the conversion process from that computer PRIOR to accessing the database from another workstation
  • Converting databases across the network is allowed if you choose the Network Type. If Local Type is chosen, conversion will not be allowed. This will force you to copy your data local to convert and retain that database locally for use.
  • If wanting prior version conversions across the network it may be possible but is not recommended. Due to the database change, Sage Timeslips Premium no longer allows use of your database locally. The Firebird Database Engine requires conversions to be competed on the physical machine that the database resides if you choose Local Type use. Attempting to initiate a conversion from a workstation that is pointed to your database on a server you will be prompted to stop and covert your database locally.

Sage Timeslips Premium/2017+ in a Terminal Services Environment

Sage Timeslips Premium can be accessed through terminal services. Users accessing Sage Timeslips Premium through terminal services uses a network station license. To review the terms of use access the Sage Timeslips Premium License Agreement. View or maintain licenses used by terminal service connections in the Licenses in Use dialog box of the Timeslips Administrator. It is recommended that you run Terminal Services in Application Server Mode instead of Remote Administrative mode.

Diagnosing Computers with Timeslips Administrator

Timeslips Administrator provides many options to help solve and resolve issues with your Timeslips installation. The Diagnose this Computer command is used to identify and solve several different types of problems on your computer.

It is recommended as a preventative measure that you use this command on each station after installing Sage Timeslips Premium to verify the installation, application and database paths. Install Timeslips Administrator on each station by running the Local Installer and choosing Custom Configuration and selecting Timeslips Administrator while deselecting all other options.
Use the Sage Timeslips Administrator in the unlikely case you encounter data corruption within Sage Timeslips Premium in the Database on the server by choosing Data Verification and running with the option to Look for Errors.

For more information on Sage Timeslips Premium/2017+ give one of our professional consultants a call 800-475-1047 www.jcscomputer.com

With over 25 years of accounting and business knowledge as well as proficient technical background you get the training and support your business needs and deserves working with a proficient expert consultant.   You can work with the same consultant to help you master your Sage Software and for those occasional questions you need help with so you can understand best practices and how to manage your company information and books.

Put our 25 years of experience to work for you!

“Your Success is Our Goal”

www.jcscomputer.com          800-475-1047          solutions@jcscomputer.com

Like us on Facebook  and follow us on Twitter

Alabama Alaska Arizona Arkansas California Colorado Connecticut Delaware Florida Georgia Hawaii Idaho Illinois Indiana Iowa Kansas Kentucky Louisiana Maine Maryland Massachusetts Michigan Minnesota Mississippi Missouri Montana Nebraska Nevada New Hampshire New Jersey New Mexico New York North Carolina North Dakota Ohio Oklahoma Oregon Pennsylvania Rhode Island South Carolina South Dakota Tennessee Texas Utah Vermont Virginia Washington West Virginia Wisconsin Wyoming
Sage Timeslips Obsolescence Policy – Effective August 1st, 2017 – 800-475-1047 – Support – Training – Consultant – Reseller

Sage Timeslips Obsolescence Policy – Effective August 1st, 2017 – 800-475-1047 – Support – Training – Consultant – Reseller

Effective August 1st, 2017, Sage Timeslips will support the current version and the year prior. To ensure compliance with operating environments and receive customer support you will be required to upgrade to the current release. Sage only supports an obsolete product while the customer’s support plan is current. Customers using Sage Timeslips 2015 and use the eCenter will have access to use until July 31st, 2017.

To ensure your product is current or to receive more information regarding this obsolescence policy contact JCS at 800-475-1047 or email solutions@jcscomputer.com.

Sage offers Support for these versions effective August 1st, 2017

Sage Timeslips 2016

Sage Timeslips 2017

Sage Timeslips Premium

For more information on Sage Timeslips give one of our professional consultants a call 800-475-1047 www.jcscomputer.com

With over 25 years of accounting and business knowledge as well as proficient technical background you get the training and support your business needs and deserves working with a proficient expert consultant.   You can work with the same consultant to help you master your Sage Software and for those occasional questions you need help with so you can understand best practices and how to manage your company information and books.

Put our 25 years of experience to work for you!

“Your Success is Our Goal”

www.jcscomputer.com          800-475-1047          solutions@jcscomputer.com

Like us on Facebook  and follow us on Twitter

Alabama Alaska Arizona Arkansas California Colorado Connecticut Delaware Florida Georgia Hawaii Idaho Illinois Indiana Iowa Kansas Kentucky Louisiana Maine Maryland Massachusetts Michigan Minnesota Mississippi Missouri Montana Nebraska Nevada New Hampshire New Jersey New Mexico New York North Carolina North Dakota Ohio Oklahoma Oregon Pennsylvania Rhode Island South Carolina South Dakota Tennessee Texas Utah Vermont Virginia Washington West Virginia Wisconsin Wyoming
 Accounting Business Solutions by JCS is a Master Certified Solution Provider for Sage and Intuit products including – Sage 50 Accounting, Sage 100, QuickBooks and QuickBooks Point-of-Sale software.
For manufacturing businesses, Accounting Business Solutions by JCS offers MiSys and JobOps manufacturing software solutions. JopOps and Corrigo are available for field service management. But Accounting Business Solutions by JCS offers much more than just small business Accounting Software…
Accounting Business Solutions by JCS performs valuable detailed business reviews to identify areas for improvement and provides solutions to increase your efficiency.
Expert-certified trainers offer the experience and solution-oriented instruction you need to maximize your accounting and business software’s power.
Our unequaled support services include installation, set-up and integration, as well as interpretation of performance results. Put our 25 years of knowledge to work for you!

Sage 50 Accounting – Receiving a Purchase Order flowing through Shipping and Completing a Sales Order – 800-475-1047 – Support – Training – Consultant – Reseller

Sage 50 Accounting Bar Code Software and Bar Code Labels

Sage 50 Accounting – Receiving a Purchase Order flowing through Shipping and Completing a Sales Order – 800-475-1047 – Support – Training – Consultant – Reseller

Wondering how Bar Code Software works?  Can your business benefit from using it?  Do you have serialized items you need to keep track of?  We’ve got the details for you.

The following will explain how Bar Code Software works with a handheld device incorporating purchase orders, receiving in purchase orders, applying purchase orders to a sales order and assigning serial numbers to items that include them.

1

For this demonstration we are using EZ Scan Software with Motorola MC75A handheld

Starting with purchase orders, logged into your company on a handheld device you’ll be prompted to choose a vendor you wish to receive a purchase order in from or the option to choose the purchase you wish to receive in either using the drop down arrow or manually key in the purchase order number with the keypad on the handheld device.  The handheld is programmed to only see open purchase orders.  So if the order has been fully received in, it will not show up as an option on your handheld.  If the purchase order was partially received, the handheld will only give you the options to receive in what is still open.  After choosing the vendor and purchase order number, the system will prompt the date in which you received it or entered it in.  Also on the screen of handheld device is a ‘Receiver #’ space to add the packing ticket or referenced received number in if you choose to reflect on receipt.

12

After choosing the vendor and purchase order you wish to receive in, the handheld will display the purchase order just as it is reflected in Sage 50.  You can view the quantities to receive, what is open on the purchase order, how many of that item was ordered, unit of measure for that item, the item description, serialized item or not, and the line number in which the item is listed on the purchase order. You have the option to ‘receive all’ or an option for ‘items’ which allows you to select a certain line item and adjust the quantity received if it does not match the original quantity of the purchase order. There is also an option for ‘notes’ which would be for example “The box was damaged.”  For serialized items that you receive in, select the ‘items’ option, then enter the quantity you wish to receive, then at the top of the screen you’ll see an option for ‘SER.’ Once selected it will open a new window where you can actually scan the barcode of the item and it will add the serial number associated with that item in the field. If you wish to assign your own serial number, you’ll click the box that says ‘ADD’ and blank consecutive serial numbers.

Sage 50 currently does not yet have the ability to direct right into your Sage 50 software, however, there is a utility that runs on your server that transfers the data back and forth between your Sage 50 data and the handheld device. Sage 50 and your handheld device will sync every 5-7 minutes to transfer data back and forth.

The handheld will also give you the option to view sales. Once selected, a new screen will pop up as ‘ship order.’ Select the customer from the drop down menu or key in the customer.  Choose the Sales Order you wish to view with the drop down option or if you know the Sales Order number you wish to view you can key it in.  If there is a Customer Purchase Order number you wish to include on the shipping information you can enter it (from the Sales Order created). There is an option for ‘Ship Via’ to select a shipping method, enter the ‘Ship Date’ and finally you have the option to enter a freight amount.  There is an option to review the bill/ship to information for customers that have more than one location or multiple addresses. There is an option to add notes either on the Statement, a Customer Note, or an Internal Note you can add those as well. Click save and it will bring you back to the Ship Item window.

12

Now we are ready to ship the item. By selecting items the new window will come up for ‘Ship Item’s Detail’ which gives the option to enter in the quantity you wish to ship and assign serial numbers for those items being shipped. Select SER box and that will bring up all the available serial numbers you have available to choose from or select the serial numbers that were scanned in upon receipt of the purchase order. There is an option for ‘Audit’ which you can select to view any open or pending items that have not yet been received/shipped/included on that transaction. Once complete, click save.

3

Back in Sage 50, you can view the open purchase orders to see what’s been received and completed. Same goes for Sales Orders. When the Sales Order is complete and ready to be invoiced, you’ll see on the Sales Order screen a button to view ‘Serial.’ By selecting that, you’ll be able to view the serial numbers of the items for that customer that were packed and/or shipped.

To view this demonstration via webcast, visit

For more information on Sage 50 give one of our professional consultants a call 800-475-1047 www.jcscomputer.com

With over 25 years of accounting and business knowledge as well as proficient technical background you get the training and support your business needs and deserves working with a proficient expert consultant.   You can work with the same consultant to help you master your Sage Software and for those occasional questions you need help with so you can understand best practices and how to manage your company information and books.

Put our 25 years of experience to work for you!

“Your Success is Our Goal”

www.jcscomputer.com          800-475-1047          solutions@jcscomputer.com

Like us on Facebook  and follow us on Twitter

Alabama Alaska Arizona Arkansas California Colorado Connecticut Delaware Florida Georgia Hawaii Idaho Illinois Indiana Iowa Kansas Kentucky Louisiana Maine Maryland Massachusetts Michigan Minnesota Mississippi Missouri Montana Nebraska Nevada New Hampshire New Jersey New Mexico New York North Carolina North Dakota Ohio Oklahoma Oregon Pennsylvania Rhode Island South Carolina South Dakota Tennessee Texas Utah Vermont Virginia Washington West Virginia Wisconsin Wyoming
Physical Inventory Count on Handheld with Bar Codes – 800-475-1047 – Support – Training – Consultant – Reseller

Physical Inventory Count on Handheld with Bar Codes – 800-475-1047 – Support – Training – Consultant – Reseller

What are the Physical Inventory Steps taken and what do they mean?

Physical Inventory is the process where a business physically counts its entire inventory. A physical inventory count may be mandated by financial accounting rules or the tax regulations to place an accurate value on inventory, or the business may need to count inventory so component parts or raw materials can be restocked. Sage 50 Physical Inventory Count provides automation to quickly count inventory and minimize down time for the business.

Inventory Control System Software can speed the physical inventory count process.

Perpetual Inventory system tracks the receipt and the use of inventory then calculates the quantity on hand.

Cycle Counting is an alternative to physical inventory which can result in actual down time for a business.

The following is how to perform a Physical Inventory Count using a Handheld Device (Motorola MC75A and EZ Scan Software) with Inventory Items having Bar Codes.

1

Starting in your Sage 50 software, from the Inventory & Services Screen select Inventory Items and View and Edit Inventory Items. This will populate a new window with your entire inventory.

Next we want to export our inventory items list to our handheld device. Logging into the EZ Scan Software, select Export Inventory from the menu bar. Select Inventory you wish to export. You can export the entire inventory list or a range of items. Once selected a new window will populate with the items you wish to include then you need to Copy Inventory to PDA.

2

You will receive a confirmation of successful completion once the data has been transferred to your handheld device.

Now that your handheld device has the transferred data it is time to view and take action. Select your Inventory Control Module on your device. A warning will notify you that you are about to begin the inventory count process. Click ok and a new window will populate shown below.

34

In the Item ID field choose the item you wish to count. In this example we’ve only chosen a range of items to be physically counted. You will enter in the Physical Count in the PhyCount field.

5

Once completed entering in your Physical Count, click ok on the handheld device. Now the data needs to be transferred back to your Sage 50 data.

From the menu option select Upload from Handled under the Inventory Count Module. Confirmation of the export will prompt you that it was successful. Review the data that you’ve entered by selecting the Physical Inventory Review (Hand Held) from the Inventory Count Module menu. If everything matches up we can import the data back to Sage 50.

From the Inventory Control Module menu, select Import Inventory Adjustment Hand Held.

6

A warning will populate to confirm your selection

Click Yes

Select Import from the menu option

7

Back in your Sage 50 Software, Select Inventory & Services, Perform Inventory Adjustment. Select List from the menu and a new window opens. Select Open on the menu bar and you will now see the transactions that have transferred over from the handheld to Sage 50. Review your adjustments if you’d like to confirm the transfer.

To view this demonstration via webcast visit

For more information on Sage 50 give one of our professional consultants a call 800-475-1047 www.jcscomputer.com

With over 25 years of accounting and business knowledge as well as proficient technical background you get the training and support your business needs and deserves working with a proficient expert consultant.   You can work with the same consultant to help you master your Sage Software and for those occasional questions you need help with so you can understand best practices and how to manage your company information and books.

Put our 25 years of experience to work for you!

“Your Success is Our Goal”

www.jcscomputer.com          800-475-1047          solutions@jcscomputer.com

Like us on Facebook  and follow us on Twitter

Alabam

X